There are several methods to attempt when it comes to heat press a shirt, hoody, and other clothing. There is screen printing, embroidery, and tie-dying. The list is endless. But a lot of individuals have discovered that dealing with heat transfer vinyl, or HTV, offers the best advantages. You may apply almost any pattern on fabric and, of course, other substrates with HTV. A computer, a vinyl cutter, an iron, and a few standard crafting tools are all you need to get started. You don’t really need any expertise or abilities, and you can make gorgeous patterns right away.
You may want to consider purchasing or upgrading to a heat press whether you are new to using heat transfer vinyl or have some expertise but have been using an ordinary home iron. In terms of operation, heat presses are comparable to irons, but they have a number of advantages. They apply pressure more consistently, transfer designs more quickly, and generate heat more precisely than irons. And although while they may appear a little scary at first, they’re actually more simpler to operate than you may imagine. Learn how to use a heat press for t-shirts, sweatshirts, and more as you read on!
Steps to Heat Press a Shirt
Setting up the Heat Press

After purchasing a heat press, you must correctly assemble it. This is to assure both your safety and the perfection of your clothes. Set the press down on a stable, flat surface. Make sure the press is low enough for you to bring down the top plate without having to extend and that you have access to it from three sides. Install the press safely away from children and animals, and plug it onto a separate outlet. To ensure that the press is applying the proper pressure, do a heat press pressure test.
Read the instruction guide that comes with your heat press in its entirety. Although this manual will provide you broad instructions on how to use it, the manufacturer is where you should look for the most accurate information. Read the safety instructions carefully as well.
Make Ready the Heat Press

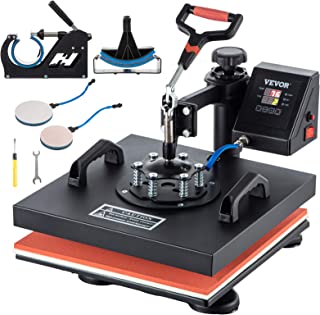
The majority of presses feature a power button, temperature gauge, pressure adjuster, and timer, and they all operate in a similar manner. Turn on the press and adjust the temperature when you’re prepared to begin working on your first project. By consulting the literature for your vinyl, you may find out what temperature to use. You can find information on how long to press and whether to take the backing off when it’s hot or cold in the documentation.
With the top plate up, let the press warm up to the proper temperature. Each machine has a different processing time for this.
Most Related Post: Top 12 Best Sublimation Printers
Take Your T-shirt

You must prepress the item before applying the vinyl, whether you’re dealing with a basic crew neck sweatshirt, t-shirt, or any other clothing. This quick procedure is essential for assuring the quality of the end product.
Place the garment on the press’s bottom plate with care. Apply the material after lowering or rotating the top plate. After letting stand for about five seconds, lift the top plate and take off the shirt. This process gets rid of creases and draws out any moisture the cloth might have.
Apply Your Favorite Design
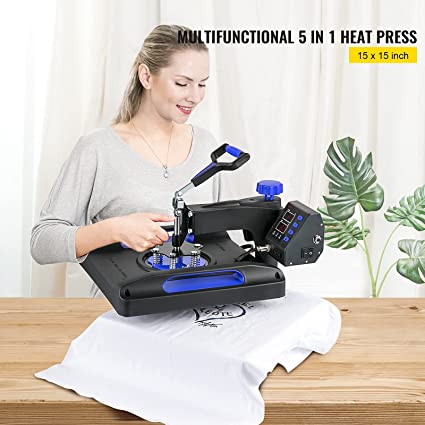
The HTV should be placed with the backing side up exactly where you want the design to appear on the shirt. Lay the garment out flat. Once you’re satisfied with the placement of the design, gently set your shirt on the bottom plate of the press, taking care not to contact the top plate. To avoid getting in the way and obstructing a tight seal, if at all feasible, let the neckline seam dangle over the edge of the bottom plate.
Before lowering or swinging the top plate into position and locking it, spread a Teflon sheet over the HTV. Wait while you set a timer. Pull out your clothing, release the handle, and take off the Teflon sheet when the time is up. Remove the backing sheet at this time if you are using hot peel vinyl. If not, wait until it has cooled. When done, you might want to press the item once more while turning it inside out. As a result, the vinyl is drawn deeper into the cloth.
Frequently Asked Questions
What do you need to heat press a shirt?
- Heat press machine
- A cutting machine
- Fabric or material you want to press
- Design.
- Heat Transfer Vinyl
How do you heat press step by step?
- Set Your Heat Press Settings
- Arrange Your Shirt
- Pre-Press Your Shirt
- Position Your Transfer on the Shirt
- Close the Heat Press to Apply
- Peel the Transfer Paper or Carrier
What temperature do you heat press t shirts?
The greatest temperature, which is around 380 degrees Fahrenheit, is needed for 100 percent cotton. Be cautious while working with polyester since it reacts to a more sensitive 270! Many different kinds of textiles respond well to heat transfer between 315 and 350, but if you’re unsure, check the instruction manual for your heat press machine.
Can I use an iron instead of a heat press?
Although an iron has a setting choice, you can’t truly be certain of the temperature because every iron has a different heat output. Applying pressure on a product using an iron rather than a heat press can occasionally be rather laborious and time-consuming since an iron doesn’t allow you to lock in a pressure setting.
What temp should I set my heat press for polyester?
The majority of heat presses advise using a 270°F temperature for printing on polyester. You should, of course, adhere to the directions in the user manual as with any gadget!
Conclusion
In comparison to using a domestic iron, employing a heat press produces more reliable results and is significantly quicker. Working with a heat press makes making blank t-shirts faster and simpler than you could have ever believed possible, whether you’re new to HTV or searching for a means to advance your projects.
