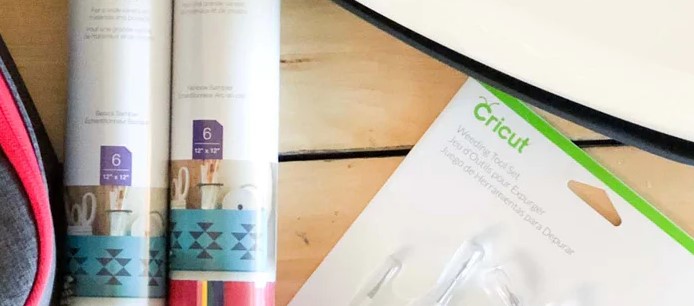
Heat press patches are an easy and cost-effective way to add a custom design to any piece of clothing. Whether you want to add a name, logo, image, or slogan to your favorite t-shirt, hoodie, or jacket, heat press patches are a great way to make a personal statement. Heat press patches are easy to make and can be completed with minimal effort and materials. In this article, we will discuss the simple process of making heat press patches and provide step-by-step instructions for creating your own.
Materials Needed to Make Heat Press Patches
Making heat press patches is a great way to add a unique and personal touch to your clothes and accessories. The process is fairly straightforward and requires only a few materials.

Heat press machine
The most important item needed to make heat press patches is a heat press machine. These machines are specifically designed to apply heat and pressure to fabric and other materials, allowing you to easily transfer designs onto them. Heat press machines come in a variety of sizes and price ranges, so be sure to select one that is appropriate for your needs and budget.
Patch material
Next, you will need to choose a patch material. Patches can be made of a variety of materials, including cotton, polyester, and vinyl. Depending on the type of patch you are making, you may need to select a material that is suitable for the application.
Heat transfer paper
Finally, you will need to purchase some heat transfer paper. Heat transfer paper is specially designed to be used with a heat press machine. It comes in a variety of colors and patterns, so be sure to select the one that best suits your design.
Once you have all the materials needed, you can begin the process of making your heat press patches. With a few simple steps, you can create custom patches that are sure to make a statement.
Steps to Make Heat Press Patches
Prepare the Patch Material
The first step in creating heat press patches is to prepare the patch material. This could be fabric, leather, vinyl, felt, or any other material that can be heat pressed. The material should be cut to the desired size and shape that you want the patch to be. Additionally, the edges should be folded over and stitched down to create a neat and durable finish. Make sure all the edges are securely stitched to prevent fraying.
Prepare the Heat Transfer Paper
The next step is to prepare the heat transfer paper. This is the paper that will be used to transfer the design onto the patch material. Place the design onto the heat transfer paper, making sure it is the correct size and shape. If the design is too large or too small, the patch may not fit properly. Additionally, make sure the design is printed with the correct side facing up.
Heat Press the Patch
Finally, place the patch material onto the heat press. Place the heat transfer paper on top of the patch material and press down firmly. Set the heat press to the proper temperature and time according to the instructions for the heat transfer paper. Once the time is up, carefully remove the patch from the heat press and let it cool. Once cooled, the patch is ready to be used.
Set the temperature and time for the press
Before beginning, you will need to set the temperature and time for the press. This will depend on the materials you are using and the size of the patch. For most patches, a temperature of 320-350 degrees Fahrenheit and a time of 8-10 seconds will work.
Place the pressing material over the patch
Once the temperature and time are set, place the patch onto the pressing material. This is usually a piece of cloth or a special heat-resistant pressing material. Make sure the patch is centered and secure the pressing material over it.
Close the heat press and press down
Close the heat press and press down firmly. This will ensure that the patch is properly adhered to the pressing material.
Wait for the press to finish
Once the press is closed and pressed down, wait for the set time to elapse. This will ensure that the patch is properly heated and adhered.
Remove the pressing material and patch
Once the press is finished, open the press and carefully remove the pressing material and patch. The patch should now be securely adhered to the material.
Finishing Touches

Adding a layer of adhesive to the back of the patch
To add a layer of adhesive to the back of the patch, you will need to purchase an adhesive backing from a craft store or online. Once you have the adhesive, simply apply it to the back of the patch and let it dry. This will help to ensure that the patch will stay in place once it is applied to the garment.
Sewing the patch onto a garment
Once the adhesive has dried, you can then sew the patch onto the garment. To do this, you will need a needle and thread, as well as a thimble if you have one. Begin by threading the needle and then carefully sew around the edges of the patch. Make sure to keep the stitches even and tight. When you have finished, tie off the thread and cut it off. Your patch is now ready to be worn!
Also Read: How to Keep Sublimation Paper from Sticking
Conclusion
Making heat press patches is a great way to customize clothing, bags and other items with your own unique style. It is a simple and cost-effective way to express your creativity and make something truly unique. With a little bit of time, patience and creative thinking, you can make heat press patches that will be the envy of your friends. With the right materials, a heat press and a bit of practice, you’ll be making your own custom patches in no time!
Frequently Asked Questions
What type of patches can I make with a heat press?
You can make custom patches with any design, shape or size. Patches can be made of fabric, leather, vinyl, PU and other materials.
What is needed to make a heat press patch?
To make a heat press patch, you will need a heat press machine, a cutting machine, a patch material such as fabric, leather, vinyl or PU, an adhesive backing, a transfer paper, and a patch template.
How do I design my patch?
You can design your patch using a graphics program such as Adobe Illustrator or Photoshop. You can also use a template that is available online.
How do I apply the patch to the garment?
To apply the patch to the garment, first place the garment on the heat press machine. Then, place the patch onto the garment and use the heat press to transfer the patch onto the garment.
How long do I need to press the patch?
The length of time you need to press the patch will depend on the type of patch you are using, the type of material the patch is made of, and the temperature of the heat press. Generally, a patch should be pressed for 8-15 seconds at a temperature of between 285-320°F (140-160°C).
