Welcome to the world of heat press designs! Heat press designs are an easy and effective way to create beautiful and unique designs for your clothing, fabric, and other items. Heat press designs are created by using a heat press machine to imprint a design onto a substrate, such as fabric or paper. With the right tools and a bit of creativity, you can create beautiful, long-lasting designs that will add a unique touch to any item. In this article, you will learn how to make heat press designs and the materials you will need to get started.
Steps to Make Heat Press Designs
Preparing for Heat Press
Choosing Appropriate Heat Press
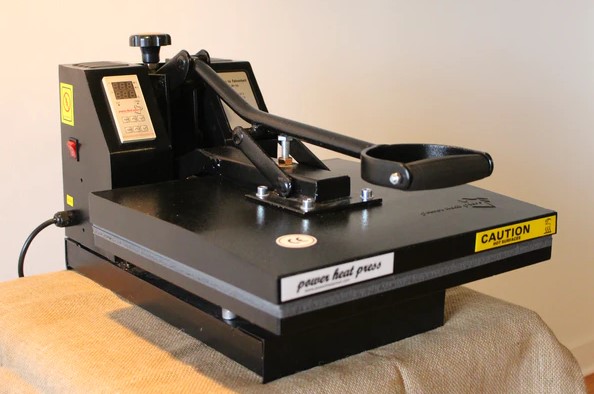
When it comes to choosing the right heat press for your project, it is important to consider the size of the item you are printing on, the type of fabric being used, and the heat press’s features. The size of the item being printed on will determine the size of the platen needed in order to adequately cover the item. The type of fabric being used will determine the required temperature settings for the heat press. Lastly, the features of the heat press should be taken into account, such as adjustable pressure, timer settings, and safety features.
Preparing Design
Before the heat press process is started, the design must be prepared. This involves making sure the artwork is correctly sized for the fabric and heat press being used. The design should also be printed onto transfer paper which is specifically made for application to fabric.
Preparing Fabric
The fabric should be pre-washed and dried before the heat press process begins. This will ensure that the fabric will not shrink when exposed to the heat of the heat press. If the fabric is not pre-washed, the design could end up looking distorted or misaligned. Additionally, the fabric should be ironed and free of wrinkles before the heat press is used. This will ensure that the design is applied evenly and without any flaws.
Applying Heat Press

Setting Temperature
When using a heat press to apply designs to t-shirts, hats, and other fabric items, the first step is to set the temperature. This will vary depending on the material you’re working with, so it is important to consult the manufacturer’s instructions for the ideal temperature. Once the temperature is set, it is time to move on to the next step.
Placing Design
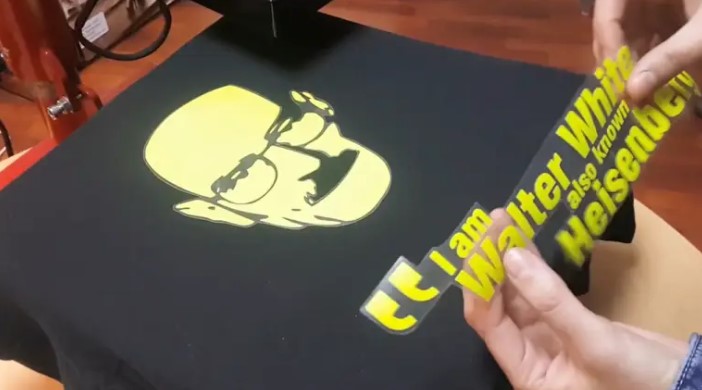
Once the temperature is set, it is time to place the design onto the fabric item. For t-shirts and hats, the design should be placed face down on the fabric. When placing the design, make sure that it is centered and that there are no wrinkles or air bubbles. This will ensure that the design is applied correctly.
Applying Pressure
After the design is in place, it is time to apply pressure to the design. This can be done by pressing down firmly on the handle of the heat press. The pressure should be applied evenly across the design to ensure that it has been applied properly.
Removing Heat Press
After the pressure has been applied, the heat press should be removed from the fabric item. If the design was applied correctly, it should be dry and ready to wear. If not, the process may need to be repeated until the desired result is achieved.
Finishing Heat Press Design

Adding Finishing Touches
Once your heat press design is complete, you can add some finishing touches. This includes trimming any excess material, adding any additional embellishments, such as ribbons, buttons, or other decorations, and adding a protective coating of sealant to the design. This helps to protect the design from wear and tear, and extends the life of the design.
Caring for Design
Once your heat press design is complete, it is important to care for it properly. This includes storing the design in a dry place and avoiding direct sunlight. Also, be sure to regularly check the design for any signs of wear and tear, and to clean it regularly with a mild detergent. Doing this will help to ensure that your design lasts for a long time.
Conclusion
Creating heat press designs is a fun and creative way to add a personal touch to your clothing and accessories. With the right materials, you can easily make your own designs. Heat press machines are the most efficient way to transfer graphics onto fabric, but you can also use an iron and some parchment paper. Whether you use a heat press or an iron, you need to use the right temperature and pressure settings to ensure that your design is transferred correctly. With a bit of practice, you can create professional-looking heat press designs in no time!
Also Read: How to Keep Sublimation Paper from Sticking
Frequently Asked Questions
What materials do I need to make heat press designs?
You will need a heat press machine, a material such as vinyl, transfer paper, and a design or artwork.
What type of heat press do I need to make heat press designs?
You will need a heat press machine that is designed to handle the material and design you plan to use.
How do I create the design I want to use?
You will need to use a graphics editing program such as Adobe Photoshop or Illustrator to create the design.
How do I transfer the design onto the material?
You will need to use a transfer paper to transfer the design onto the material.
What temperature and time settings should I use?
The temperature and time settings will depend on the material you are using. Refer to the manufacturer’s instructions for the correct settings.
